How to Make Laundry Room Shelves
Take a break for an afternoon. You can make DIY shelves for your laundry room that will be both storage and display.
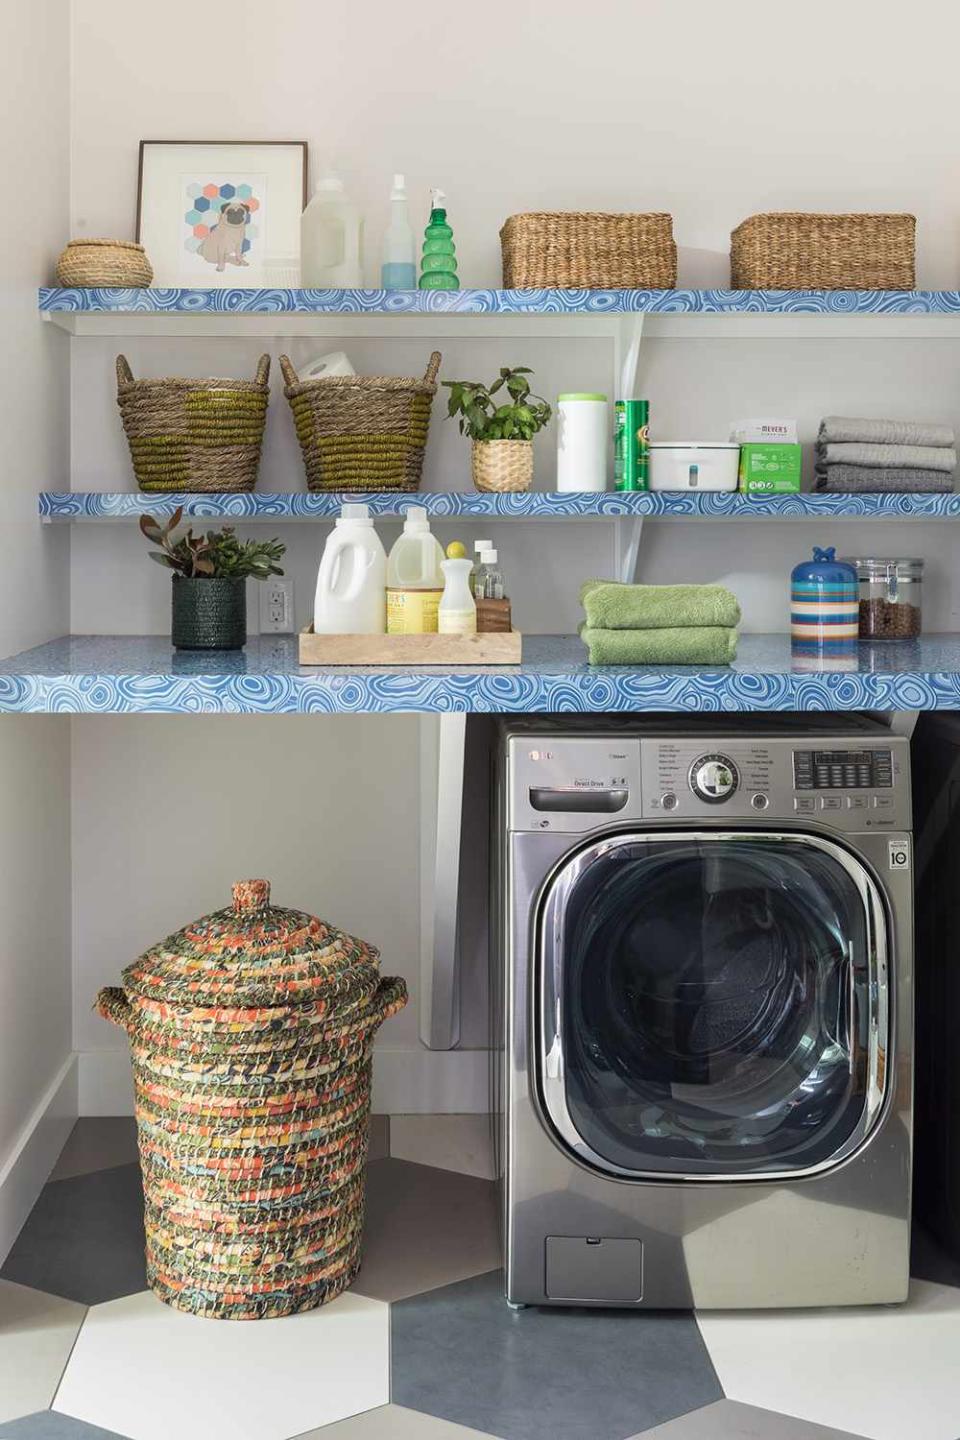
From detergent to dryer sheets and baskets of clean clothes, there’s no shortage of items to shuffle and store in your laundry roomShelving is essential for this reason. You can also display your personal style with DIY laundry room shelves.
If your home’s builder didn’t deem laundry room shelving important enough to make the punch list, you might find yourself looking for a custom solution. Worry not; we’ve got the perfect way to add shelving to your laundry room and give it the style and function boost it deserves.
How to choose a laundry room shelf style
The layout of your laundry room will determine the type of shelf you choose. It is easy to create extra-deep floating shelves if your washer/dryer are in close proximity. However, if your appliances sit against a standard wall, it can be a tad trickier, but we’ll explain a way to get around this.
How to Make Laundry Room Shelves
What You Really Need
-
2×2 x 8’ pine boards
-
1×3 x 8’
-
1/2″ x 4’x8’ sanded plywood sheet
-
Circular saw
-
Orbital sander equipped with 220-grit sanding pad
-
Measurement tape
-
Pencil
-
4-level or laser level
-
Stud-finder
-
Drill
-
Drill bits
-
3-1/2” self-tapping wood screws
-
Finish nail gun, hammer, and finish nails
-
Wood glue
-
Pre-stain wood conditioner (if staining)
-
Paint, stain and sealant
-
Paint and staining supplies
Step 1: Measure your space
From one side, measure the space for your laundry room shelf. If your shelves won’t span the full depth of the side walls, get a measurement of your ideal depth. You can adjust the dimensions to make your shelves 18 inches tall in this tutorial.
Step 2: Cut wood
Two 2×2 boards should be cut to the same side-to-side measurements. Next, cut several 2×2 board measuring 14-1/4 inches. These boards will serve as internal frame supports and run from back to front. Cut one board for each end, one for each foot between the ends.
Step 3: Create a Shelf Frame
Lay the longer 2x2s on your work surface. Place the ends on the shorter 2x2s against one side of the longboard. One board should be placed at each end. The remaining boards should be equally distributed throughout the middle. Use 3-1/2-inch self tapping wood screws to screw the back of the longboard into each end of the short board.
Step 4: Prepare the Wall
Use a stud-finder Locate each stud along each side and back wall of the alcove. Once you have marked each stud, you can use a long-level or laser level to draw a line at the height that the shelf will be mounted.
Step 5: Mount the Frame
With the ends of the shorter boards facing outward, lift the frame from the wall. The long board should be screwed through the wall using three-1/2 inch self-tapping wood screws. The side boards should be adjusted until they are level. Finally, secure them to wall studs. The frame is complete when the last 2×2 is screwed to the exposed ends on the short boards.
Step 7: Cut and Mount Plywood
The 1/2-inch plywood should measure exactly to the dimensions of the shelf frame. There should be no excess on the front. Use a little wood glue to attach the plywood to each frame. The plywood should be nailed into the frame using a finish nail gun Use a hammer to finish nails. You can repeat this procedure to cover the underside.
Editor’s tipUsing a long straight piece of plywood to guide your cutting, you can clamp it to plywood sheets for quick and precise cuts. circular saw’s To ride against a fence
Step 8: Mount and cut the front board
To cover the frame and the delicate edges of the plywood, you’ll need to mount a board on the front of the shelves. Cut a 1×3 along the length of your shelves. Next, glue and nail it with the same method as the plywood.
Step 9: Sand Boards
Sand the shelves To remove any splinters and prepare the surface for your finish.
Step 10 – Build the remaining shelves
To build as many DIY laundry area shelves as you require, repeat steps 1-9.
Step 11: Close the Shelves
You can paint the shelves to match the wall or stain them for a natural contrast. To ensure that the stain is absorbed evenly and does not blotch, you should always apply a pre-stain conditioner to soft wood and plywood. Follow up with your chosen stain and sealant, following the manufacturer’s instructions for proper application.
How to build shelves on standard walls
While this method can technically be used in rooms without the side walls found in an alcove or closet, the lack of support on the sides will drastically decrease the shelves’ ability to support the necessary weight. For this reason, we don’t recommend it. A standard shelf board and brackets are a stronger option. If you’re set on the look of floating shelves, consider purchasing prefabricated metal floating shelf hardware and decreasing the depth of the shelves.
: